Guide to Fabric Thickness Test
When the fabric is subjected to a specified pressure, the vertical distance between the front and back sides is called the thickness, generally expressed in millimeters. Fabric thickness has a great influence on the wearing properties of the fabric. For example, the fastness, warmth retention, breathability, windproofness, stiffness and drape of the fabric are all related to the thickness of the fabric to a large extent.
Contents
Fabric thickness testing steps
The thickness of the fabric plays a vital role in the appearance, feel and use of the fabric. Fabrics that are too thin may cause discomfort, while fabrics that are too thick may cause excessive warmth. The correct fabric thickness and density can make the fabric more breathable, stable and comfortable.
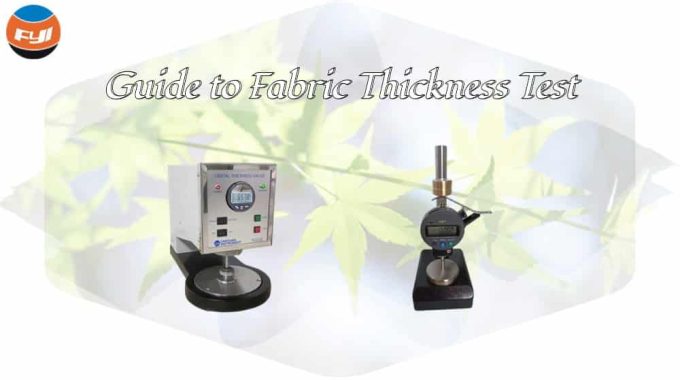
Fabric thickness can be measured using a variety of methods, including hand measurements, digital thickness gauges, and microscopic measurements. Hand measurement is the most commonly used method. The thickness of the fabric can be felt more intuitively through the hand feel. Digital thickness gauges have high accuracy and can be used for precise measurement of fabric thickness. Microscopy is a more accurate method of calculating the thickness of a fabric by measuring the density of yarns in the fabric.
- Clean the exposed parts of the instrument, especially the reference plate, presser foot, measuring rod, etc., and do not allow any dust or fibers to occupy it.
- According to the requirements of the fabric to be tested, select the presser foot area, pressing time and weight, and replace the selected presser foot and weight (according to one of the following standards: ISO 5084, ISO 9073-2 (normal nonwovens), GB/T 3820, GB/T 24218.2 (normal nonwovens)).
- According to the test needs, select the “continuous” or “single” and “10s” or “30s” button positions, turn on the power, and press the start button to make the instrument work.
- Zero adjustment of the electronic dial indicator: Connect the power supply and turn on the power switch. The power indicator light will turn on. According to the requirements of the fabric to be tested, select the presser foot area and pressure weight, put the button in the “single” position, and press the start button to make the instrument work. When the presser foot contacts the reference plate, the reading indicator light lights up and the buzzer sounds. Press the reset button again to reset the electronic dial indicator to zero.
- When the presser foot is raised, place the fabric or sample to be tested on the reference plate without tension.
- “Single” test: In the experiment, when the presser foot presses the fabric to be tested for 10 seconds, the reading indicator light automatically lights up and the buzzer sounds. While the reading indicator light is on, the display on the electronic dial indicator should be read as soon as possible. Thickness value, and make a good record, the reading indicator light does not light up, and the display value of the electronic dial indicator is invalid.
- “Continuous” test: that is, after the reading indicator light goes out, the presser foot will automatically rise and automatically cycle up and down. Using the gap between the rising and falling of the presser foot, the fabric to be measured can be moved to a new measurement position, and its thickness values can be recorded one by one. (When the reading indicator light is on, the recorded value is valid, otherwise the value is invalid.)
- After the test is completed, return the presser foot to its initial position (that is, close to the reference plate), turn off the power, remove the pressure weight, and cover the instrument with a cover cloth to prevent dust from intruding.
Precautions for fabric thickness testing
- When replacing the presser foot or when the instrument is not used for a long time, please place a protective rubber pad between the presser foot and the reference plate to protect the measuring surface from damage.
- After each experiment, the power switch should be turned off and the power plug of the instrument should be pulled out of the power socket.
- Clean and maintain the instrument well, and add a small amount of clock oil regularly.
- Carry out regular instrument calibration as needed to ensure the accuracy of instrument measurement values.
- When the instrument is not used for a long time, the battery should be removed to avoid leakage.
Influencing factors in fabric thickness testing
Fabric thickness is generally measured using a fabric thickness meter. There are many factors that affect the thickness of the fabric, such as the linear density of the yarn, the structure of the fabric, the degree of buckling of the yarn in the fabric, and the tension during production and processing. In addition, such as the area of the presser foot selected during the test, the pressure and effect applied Time, etc., all have an impact on the measured thickness.
a) The thickness of the fabric increases as the area of the presser foot increases.
b) The thickness of the fabric decreases as the applied pressure increases.
It can be seen that the fabric thickness is a conditional value. The thickness values obtained by selecting different presser foot areas, applying different pressures and different reading times are different. Generally, the measured thickness of blankets and pile fabrics changes greatly, while the thickness of coarse cloth and canvas fabrics has smaller changes. Therefore, when measuring fabric thickness, the presser foot area should be selected according to the standard recommended value, and the applied pressure value should be based on the material technical conditions or mutual agreement, and the selected presser foot area and applied pressure value should be noted on the test report.
When producing and processing fabrics, the thickness and density of the fabric can be adjusted by controlling the yarn density and weaving method of the fabric. By adjusting the yarn density of the fabric, fabrics of different thicknesses can be achieved. At the same time, different weaving methods will also affect the thickness and density of the fabric.
Digital Thickness Gauge for Textile
YG141D Series Digital Thickness Gauge for Textile is used to determine the thickness of textiles when under a specified pressure.
Related standards are as follows: ISO 5084, ISO 9073-2 (normal nonwovens), GB/T 3820, and GB/T 24218.2 (normal nonwovens).

Follows are features of the digital thickness tester:
- Lifting up and down electrically; display thickness automatically by digital LED;
- With continuous and single measuring function, improve measuring efficiency;
- Pressuring time is pre-settable, thus avoid error caused by manual operation;
- Provide two units of thickness for choosing, mm or inch.


Comments are closed.
Hey, have you checked out the latest post? It’s a must-read for anyone curious about the topic.