
Pilling Test Procedure and Machine
During the wearing process, clothes are constantly subjected to friction, causing the fiber ends on the surface of the fabric to be pulled, belted, hooked, and pulled out, and the phenomenon of hairiness forming on the surface of the fabric is called fluffing. As the hairiness is gradually pulled out and stretched out, generally more than 5mm, when subjected to friction, these fiber ends will hook each other and become entangled to form an irregular ball shape, which is called pilling.
As the fabric continues to rub during use, the fiber balls gradually become closer, causing the fibers connected to the fabric to be repeatedly bent, fatigued, and even broken in different directions. The fiber balls fall off from the surface of the fabric, but after that, the fiber hairiness at the broken end will remain. During use they continue to be pulled out and form fiber balls again.
Generally speaking, wool fibers and chemical fibers are prone to pilling, especially carded wool fabrics or wool-like carded fabrics and cashmere fabrics. From the perspective of yarn and tissue structure, the yarn twist is small, the hairiness is high, the fabric structure is loose, and twill and satin fabrics with long floating lines are prone to pilling.
Contents
Pilling test operation process
This test method refers to BS 5811 Determination of the resistance to pilling and change of appearance of fabrics.
Sample preparation
- Cut a 125mm*125mm sample parallel to the longitudinal or transverse direction, and mark the serial number and longitudinal direction (or warp direction) on the back of the specimen. For samples whose front and back sides cannot be distinguished (such as double-sided fabric, rib fabric, etc.), both sides must be tested.
- Fold the sample in half along the transverse direction (or weft direction) with the wrong side facing out and the front side facing in. Sew the sample into a cylindrical shape along a straight line 12mm away from the long side of the sample. The suture line must be straight to ensure that the suture area is flat.
- Cut off 6mm from both sides of the cylindrical sample, and then turn it over so that the front side faces outward and the seam faces inward.
- Put the prepared sample on the polyethylene cylinder through the sample holder, so that the distance from both sides of the sample to the edge of the polyethylene cylinder is equal and the seams should be evenly distributed on both sides to ensure that the seams of the sample are flat.
- Stick no more than 1.5 circles of PVC tape on both sides of the sample to fix it on the polyethylene cylinder, and an exposed distance of 6mm should be left on the edge of the polyethylene cylinder.
- Before testing, the sample must be placed in an environment of 20±2℃ and 65±2%RH for more than 4 hours.
Test steps
- Use a vacuum cleaner to remove dust and cloth scraps in the linting and pilling test box.
- Place 4 samples in each test box, which should be as close in color and with the same tissue as possible.
- Set the number of revolutions required for the test, then clear the last test record and start the machine.
- When the set test revolutions are reached, the machine automatically stops. Remove the specimen and cut along the suture line.
Score
Place the removed sample under the designated light box, compare it with the original sample, and rate the test sample as described in the following table. Fill in the results into the corresponding test report.
| level | Description | |
| 5 | No change | No change in sample surface |
| 4 | slight changes | Slightly rough surface |
| 3 | moderate change | The following conditions may occur on the surface a. Medium level of villi b. Individual hair balls appear |
| 2 | significant changes | Obvious fuzz or pilling appears on the surface |
| 1 | serious changes | The surface is densely covered with fluff or hair balls |
Safety and precautions
- Before using the instrument, you must read the instrument operating instructions and abide by the “Laboratory Safe Operation Regulations” during operation.
- When the instrument is working, its four test boxes are exposed and rotating. Try to avoid getting close to them during operation to avoid injury.
- Because some customers require different test revolutions, the set revolutions are also different.
- The sutures of the specimen must be straight, and when inserted into the polyethylene tube, the seams should be evenly distributed to ensure that the sutures are flat.
Test instrument
Pilling test instruments mainly fall into the following three categories:
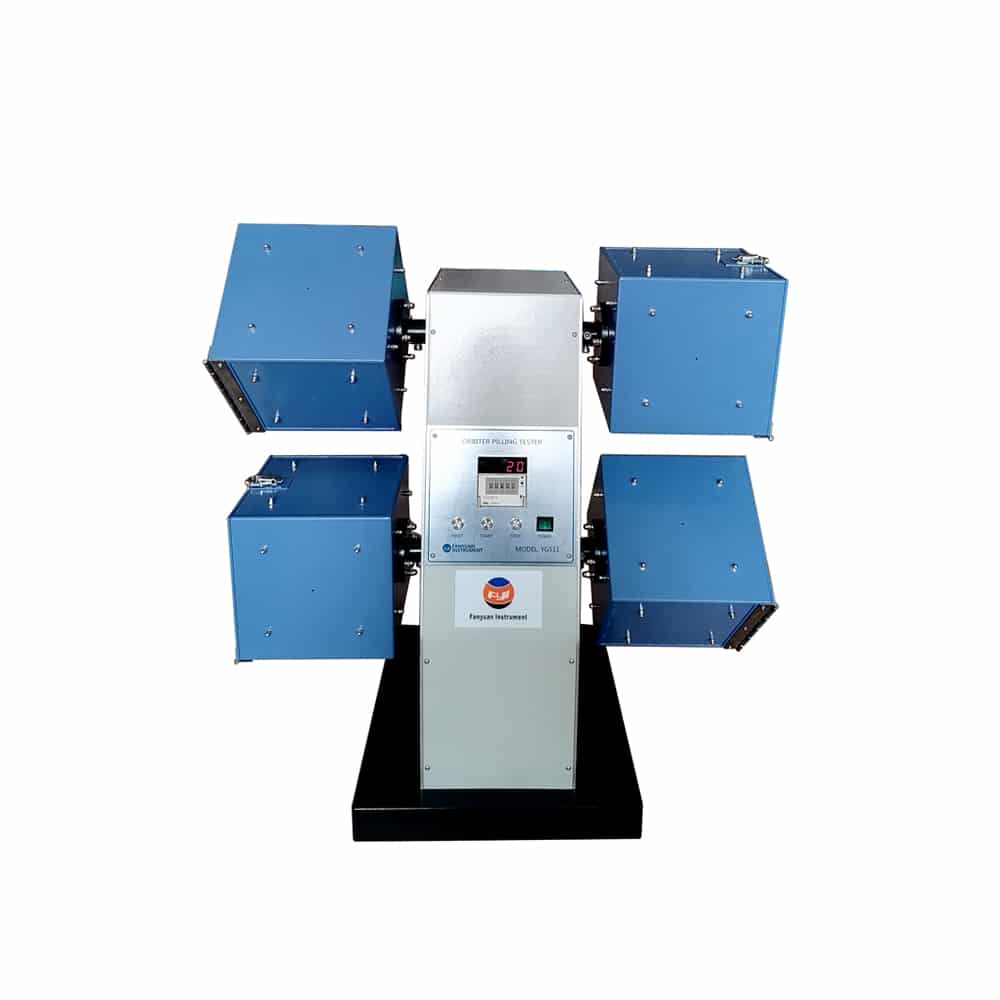
Pilling box type
In a rotatable rolling box with rough inner walls, the fabric is wrapped on a mandrel. After tumbling a certain number of times in the box, the rating is compared with the standard physical sample or its photo.
The pilling box type is usually two boxes or four boxes, and the speed can be adjusted to five speeds of 25, 30, 40, 55 and 60r/min respectively.
ICI pilling tester is mainly used for pilling of shuttle and knitted fabrics caused by friction without pressure. when sample pasted on the rubber hose, prevent to the test cabinet and make test box rotates at a certain speed, is the sample and the lining and mutual free friction, after a specified time, remove the specimen, contrast diagram evaluation sample card friction resistance level.
Random flipping
This instrument is a standard testing machine developed and patented by AATCC. The fabric tumbles in the cylinder, causing random friction and pilling. It is suitable for woven and knitted fabrics. The tester is equipped with a timer and an air-filling device to prevent the fabric from clinging to the cylinder wall during testing and affecting the effect.
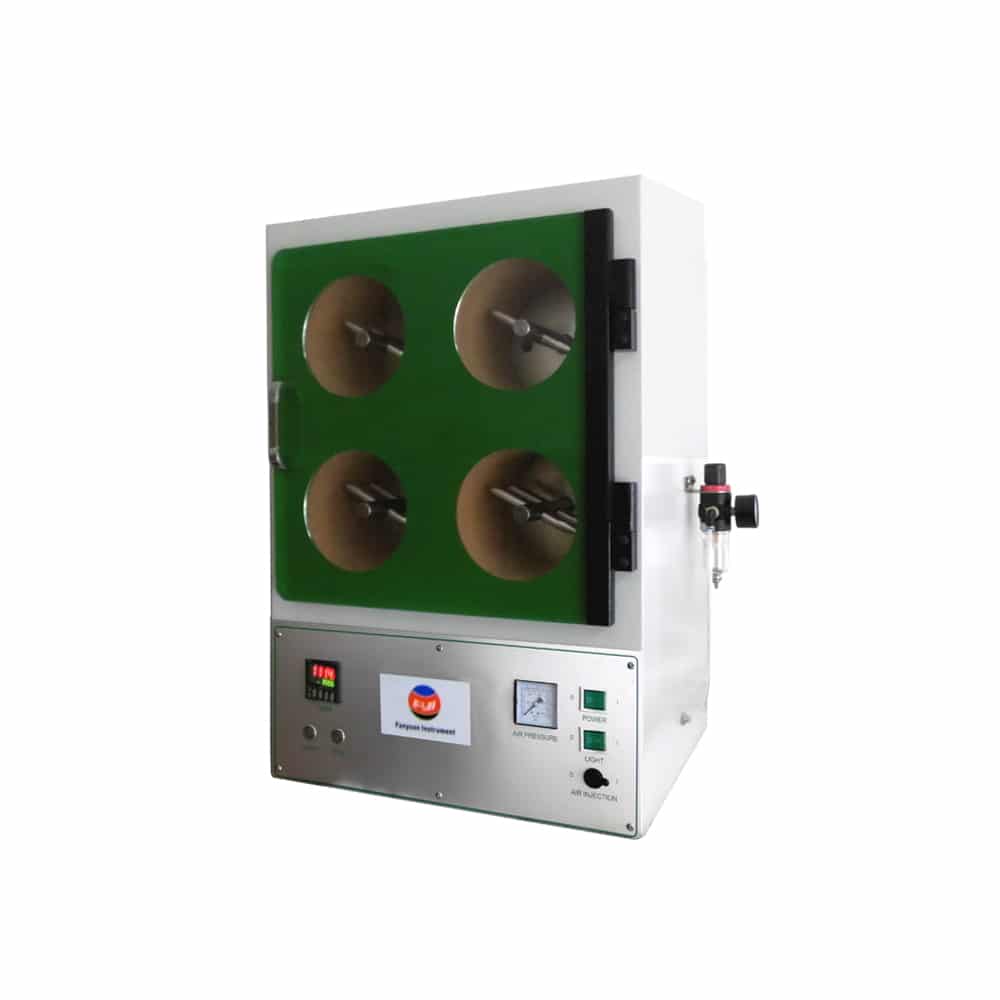
Random Tumble Pilling Tester is to imitate the frictional effect of wearing, the test sample and a small amount of grey short cotton fiber were added into the cylindrical test box and the cork Line , and the test results were compared with the standard photograph.
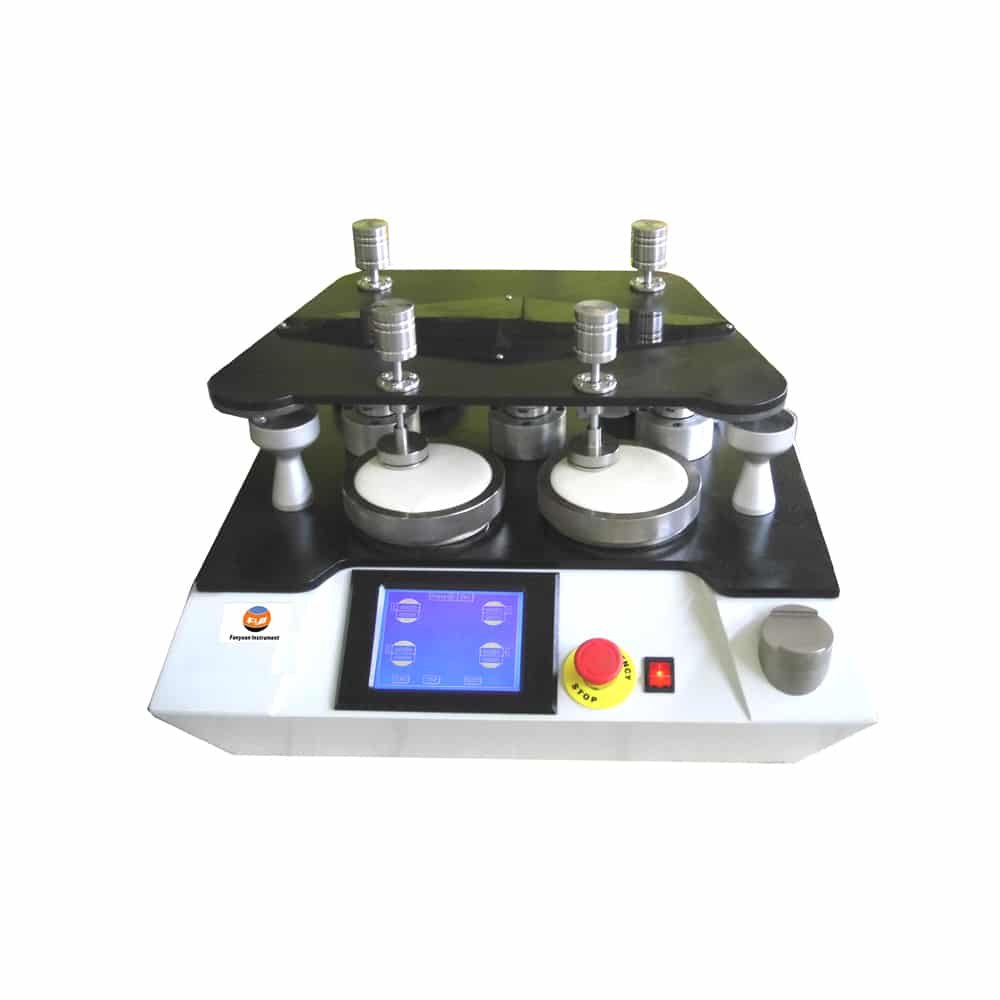
Martindale instrument
This instrument integrates the two functions of testing friction and pilling, but the two tests cannot be performed at the same time and exist as an independent unit. When operating the pilling test, the pressure is exerted by weights, which is 2.5cN/cm2 for knitted fabrics and 6.5cN/cm2 for woven fabrics.
Martindale Abrasion and Pilling Tester is applied to determine the pilling and abrasion resistance properties of most of textile (including woven fabric, knitting, nonwoven fabric, ramie, silk etc.) with bearing slight press. The relative movement track of specimen and abrasion is Lissa-jous figure. Circular fabric sample under certain pressure with standard abrasive according to Li Sha as (Lissajous) and track curve of friction .


Comments are closed.
Did you know that the author’s expertise shines through in every sentence, making it a joy to read?
Need a recommendation for an insightful and well-written article? Look no further than this gem.
Lots of effort and expertise goes into curating the content of this outstanding blog.
To anyone seeking well-researched content, this blog is a goldmine of information on a wide range of topics.