The Definitive Guide to the Ross Flexing Test
The durability and integrity of shoe soles under repeated flexing are critical performance parameters directly impacting product longevity, consumer safety, and overall value. Footwear is subjected to constant bending stresses during normal use, particularly in the forefoot area, making the sole’s resistance to crack initiation and propagation a fundamental indicator of quality. The Ross Flexing Test as one of the most established and widely recognized laboratory methods within the footwear industry for evaluating this essential characteristic.
This standardized test rigorously simulates the dynamic flexing action experienced by a shoe sole in service. By subjecting a precisely prepared specimen containing an artificial notch to controlled, repetitive bending cycles, the test quantifies the material’s inherent ability to resist the growth of this initial flaw. The resulting “notch growth rate” provides manufacturers, material suppliers, and quality control laboratories with a vital, objective metric for comparing materials, optimizing formulations, assessing production consistency, and ensuring compliance with performance specifications and industry standards.
Internationally recognized standards, primarily ASTM D1052 (“Standard Test Method for Measuring Rubber Deterioration—Cut Growth Using Ross Flexing Apparatus”) and ISO 5423 (which references similar methodology), govern the precise procedures for conducting the Ross Flexing Test. This document details the specific methodology based on ASTM D1052, encompassing the test’s purpose, fundamental principle, meticulous specimen preparation requirements, and the step-by-step operational protocol. Adherence to this defined methodology is paramount to generating reliable, reproducible, and comparable test data that accurately reflects the flex crack resistance performance of shoe sole materials under evaluation.
Contents
The standard of ross flexing test
The Ross flexing test is one of the common test items for footwear. It primarily measures the ability of footwear materials to resist cut growth after continuous flexing. Common test standards include ASTM D1052 and ISO 5423.
ASTM D1052: Measuring Rubber Deterioration—Cut Growth Using Ross Flexing Apparatus
ISO 5423: Moulded plastics footwear – Lined or unlined polyurethane boots for general industrial use – Specification
Determination of Ross Flexing Test (Based on ASTM D1052)
Purpose
To test the ability of the shoe sole to resist cut growth after continuous flexing, i.e., its flex resistance.
Test Principle
A strip specimen from the shoe sole is mounted on the Ross flexing apparatus, positioned such that the notch is directly above the center of the apparatus’s pivot shaft. The apparatus flexes the specimen freely through an angle of (90 ± 1)° about its axis. After a specified number of test cycles, the length of the notch in the specimen is measured. The flex resistance of the shoe sole is evaluated based on the magnitude of the notch growth rate.
Specimen Preparation
- Extract at least 2 test soles. Using a rectangular die with dimensions ≥ 152 mm × (25 ± 1) mm, cut at least 2 specimens longitudinally along the sole. If sufficient material is available, it is preferable to cut 3 specimens.
- Inspect the inner surface of the specimens. If an internal welt is present, remove it flush using a sharp knife or grinding machine.
- Measure the thickness of the specimens using a micrometer. If a specimen’s thickness exceeds (6.35 ± 0.03) mm, grind it down to (6.35 ± 0.03) mm.
- Unless otherwise specified, condition the prepared specimens at 100°C for 24 hours. Subsequently, place them in a standard environment with a temperature of (23 ± 2)°C and relative humidity of (50 ± 5)% for 16 to 96 hours.
Operation Steps
- Remove all conditioned specimens. Using a punching tool, punch a notch completely through each specimen along its width direction, perpendicular to its length direction, centered across its width, and located (62 ± 2) mm from the clamped end. Note: If the specimen is hard, lubricate the punch tip with soap solution.
- Using a micrometer, measure the thickness at 3 points across the width of the notch area for each specimen. Record the median value as the specimen thickness, accurate to 0.1 mm.
- Place each thickness-measured specimen on a triangular viewing stand, positioning the notch over the stand’s apex arc. Measure the initial notch length (L₁) using an optical magnifier with at least 2x magnification, accurate to 0.5 mm.
- Level the flexing end clamp of the Ross apparatus (position the specimen clamping device horizontally). Mount all specimens symmetrically on the apparatus, ensuring the notch is positioned directly above the trailing edge of the pivot shaft. Note: If an odd number of specimens prevents symmetric mounting, clamp a sole block of equivalent thickness in the fixed clamp to ensure stable and symmetric loading.
- Adjust the upper roller of the Ross apparatus so that it just contacts the specimen, ensuring the specimen can move freely between the upper and lower rollers during flexing and causes them to rotate. Lock the upper roller in this position.
- Turn on the Ross apparatus power. Set the desired number of flexing cycles. Press the “Test” button to start. Periodically and randomly observe and measure the notch growth, recording the number of completed cycles and the corresponding notch growth length (accurate to 0.5 mm), along with any other damage. Note: When measuring, place the specimen on the triangular viewing stand and use the ≥2x optical magnifier. Stop the test and remove the specimen if the notch growth reaches 500% of its initial length (L₁). Also stop the test and remove the specimen after 250,000 cycles if notch growth is very slow.
- Place each removed specimen on the triangular viewing stand. Measure the final notch length (L₂) using the ≥2x optical magnifier, accurate to 0.5 mm. Note: In some cases, notch growth may not be a straight line but form star-shaped cracks. Regardless of crack direction, measure the length of the longest continuous crack as L₂.
- Calculate the notch growth rate (R) for each specimen, accurate to 0.1 mm/kC, using the formula:
R = (L₂- L₁) / C
Where:C= Number of completed flexing cycles, in thousands of cycles (kC).
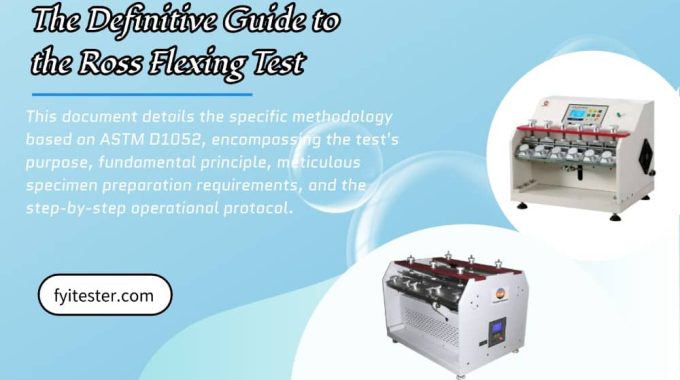
Ross flexing tester
Ross Flexing Tester is used for determining the ability of shoe sole to resist crack growth when subjected to repeated bend flexing. It’s not only suitable for all kinds of flexible vulcanized rubber soles, but also suitable for other flexible soles. Mount the pierced strip test piece on the instrument in a way the cut is right above the middle of the rotating rod. The test piece is bent freely over the rod to a 90° angle and the cut length is measured at frequent intervals, to determine the cut growth rate and assess the flexing resistance performance.
