Fabric Stiffness Tester Test Method and Procedures
Fabric stiffness is one of the basic styles of fabrics and one of the key indicators that determine the beauty of fabrics and consumer preferences, such as the stiffness of suits, the softness of knitted underwear, and the stiffness of nonwovens.
Contents
What is the stiffness of fabric
The stiffness of clothing materials refers to the flexural stiffness and softness of the fabric. The ability of a fabric to resist shape changes in its bending direction is called bending stiffness. Bending stiffness is often used to evaluate its opposite characteristic – softness. The bending stiffness of clothing materials is determined by the bending stiffness and structure of the fibers and yarns that make up the fabric, and increases significantly as the thickness of the fabric increases.
Knitted fabrics have greater softness; compared with knitted fabrics, woven fabrics of the same thickness have greater bending stiffness. Under other conditions being equal, plain weave fabric is stiffer. As the yarn floating length in the fabric increases, the interweaving points between warp and weft yarns decrease, the bending stiffness of the fabric decreases, and the fabric body becomes soft. Under the condition that the tightness in the warp direction (or latitude direction) is constant, it is proportional to the tightness in the latitudinal direction (or warp direction). The results of changes in fabric stiffness caused by warp tightness and weft tightness are approximate. When the tightness is close, the bending stiffness of fabrics with fine yarns is smaller, and the fabrics with large bending stiffness feel stiff.
Fabrics and underwear materials for general clothing need to have good softness to meet the body’s fit and fit needs. Materials used for outerwear should maintain the necessary shape and have certain styling capabilities when worn. At the same time, the fabric should have a certain degree of rigidity and flexibility.
Fabric stiffness test method
At present, there are many methods for measuring rigidity and flexibility at home and abroad, among which the simplest method is the inclined plane method. The experimental principle is to use a narrow fabric test strip of a certain size as a cantilever beam. According to its flexibility, its bending length, bending stiffness and bending elastic modulus can be tested and calculated as indicators of fabric rigidity and flexibility.
The bending length is numerically equal to the cube root of the bending stiffness of the fabric per unit density and unit area weight. The larger the bending length value, the stiffer the fabric and less likely to bend.
Bending stiffness is the bending stiffness of fabric per unit width. The greater the bending stiffness, the stiffer the fabric. Bending stiffness varies with fabric thickness and is proportional to the cube of fabric thickness.
The bending elastic modulus can be obtained by dividing the bending stiffness by the cube of the fabric thickness. The larger the bending elastic modulus value, the greater the rigidity of the material and its resistance to bending and deformation.
Fabric stiffness tester
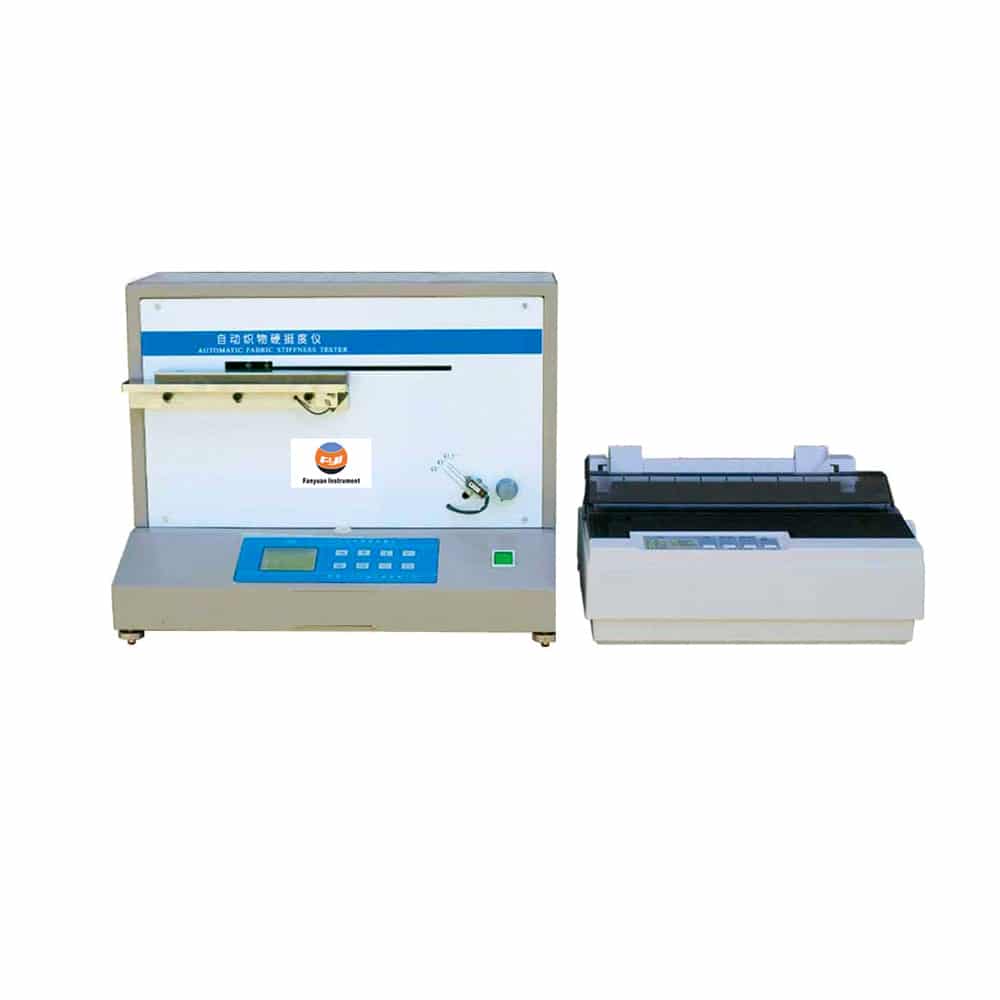
FY207 Automatic Fabric Stiffness Tester is designed to determine the bending height, flexural rigidity and bending modulus of fabrics by simple procedures and calculation, and suitable for stiffness testing of cotton, wool, silk, ramie and chemical fabrics.

On the fabric stiffness tester, the specimen is suspended as a uniformly distributed load, flat on the workbench. The driving mechanism makes it move at a constant speed along the length direction. When it bends and sag due to its own weight and touches the slope detection line, measure the extended length L. The calculated bending length is also known as suspension stiffness and bending stiffness (also known as bending stiffness). Based on the principle that the greater the bending stiffness, the more difficult it is to bend, it is used as a test index to evaluate the rigidity and flexibility of the material being tested. There are three measuring angles: 41.5°, 43° and 45°. The calculation formulas for bending length and bending stiffness are as follows:
When the test angle is 41.5°:
Bending length C≈L/2 (mm)
Bending stiffness B=G×C3/10 (g/m2)
In the formula: G—mass per unit area of the sample (g/m2), L—protrusion length (mm)
When the measurement angle is 45°:
Bending length C=0.487L (mm)
Bending stiffness B=G×0.1155L3/10 (g/m2)
When the measurement angle is 43°:
Bending length C=0.5L (mm)
Bending stiffness B=G×0.125L3/10 (g/m2)
Experimental methods and procedures
1. Sampling: Measure three samples of 25×200mm on the fabric. There are two testing methods:
Method A: The sample is tested N times in the warp and weft directions.
Method B: Test the forward and reverse directions of the sample separately.
2. Experimental steps
- Adjust the screws at the bottom corner of the instrument to make the instrument horizontal, turn on the power, and press the power switch of the instrument.
- Set the experimental test parameters, check and adjust the angle adjustment knob, so that the test line indicator indicates the required position and is consistent with the set value.
- Place the sample flatly on the working platform of the stiffness tester with the front side facing up, so that the end of the sample is aligned with the front end of the supporting plate, and the projection of the sample overlaps the turning plate.
- Drop the flip plate and press it on the sample (pay attention to whether the sample is aligned). Press the “Work” button, and the instrument starts testing. The flip plate drives the sample to move synchronously toward the detection slope at the set speed, and the instrument automatically stops testing. , and return to the initial position to stop, record the measured extension length value, and the instrument calculates the bending length and bending stiffness.
- If method A is used, take out the sample and prepare for the next experiment; if method B is used, turn the sample upside down and test again.
- After testing the set number of samples, press the composite key “Print” (press the “Set” and “→” keys simultaneously) to print the test report; you can also press the “Search” key to observe the test results on the LCD screen.
- After all tests are completed, cut off the power supply and clean the instrument.
Leave a Reply
You must be logged in to post a comment.

:The-most-valuable-guidance-680x380.jpg)

Can count on this blog to deliver consistently high-quality content that never fails to impress.
Want to expand your knowledge? This blog is the perfect place to start.